Lace — the Midnight wallet.
Lace is the official browser extension wallet for Midnight. It connects to DApps, holds your shielded and public addresses, and signs transactions without ever exposing your private witness data. Built by the same team behind the Midnight network.
Browser Extension
Install in Chrome, Brave, or Edge. One click to connect any Midnight DApp. No desktop binary required.
Hardware Wallet Support
Pair with Ledger for cold-storage signing. Keys stay on the device; only proofs cross the wire.
Selective Privacy
Choose what to reveal. Every transaction can be fully shielded, fully transparent, or somewhere in between — you control the dial.
DApp Connection
Standard injection pattern. Any Lovable build that targets Midnight can request accounts, sign proofs, and submit transactions through Lace.
NIGHT Token Community Allocation
The Glacier Drop is Midnight's community allocation programme for the NIGHT token. Eligible participants — including early testnet contributors, hackathon builders, and ecosystem partners — may qualify for a distribution. Lace is the wallet you will use to receive and manage the allocation when the programme goes live.
Create your Midnight wallet in ten taps.
Screens below are from the current Lace release with Midnight support enabled. Steps 09–10 show where to grab the address the faucet needs, and how to switch on tDUST.
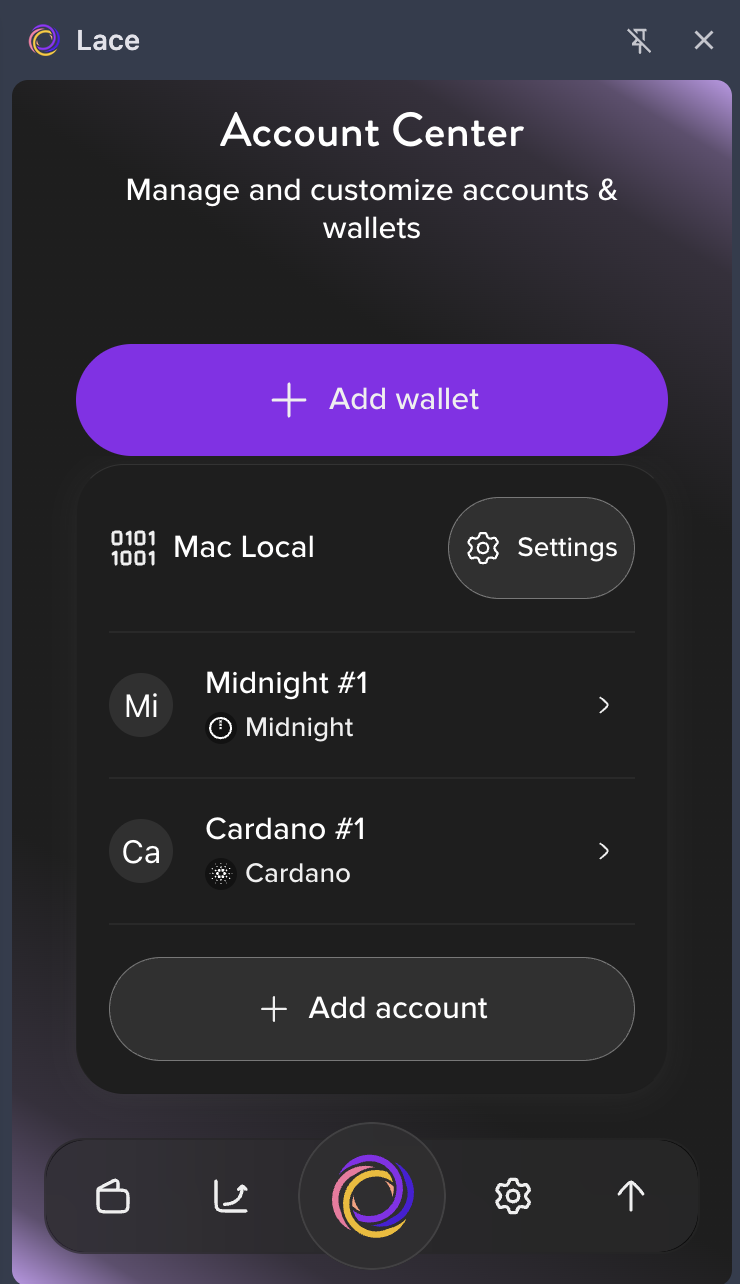 01 · account centerOpen Lace → Add walletLaunch the Lace extension and click the purple Add wallet button at the top of the Account Center.
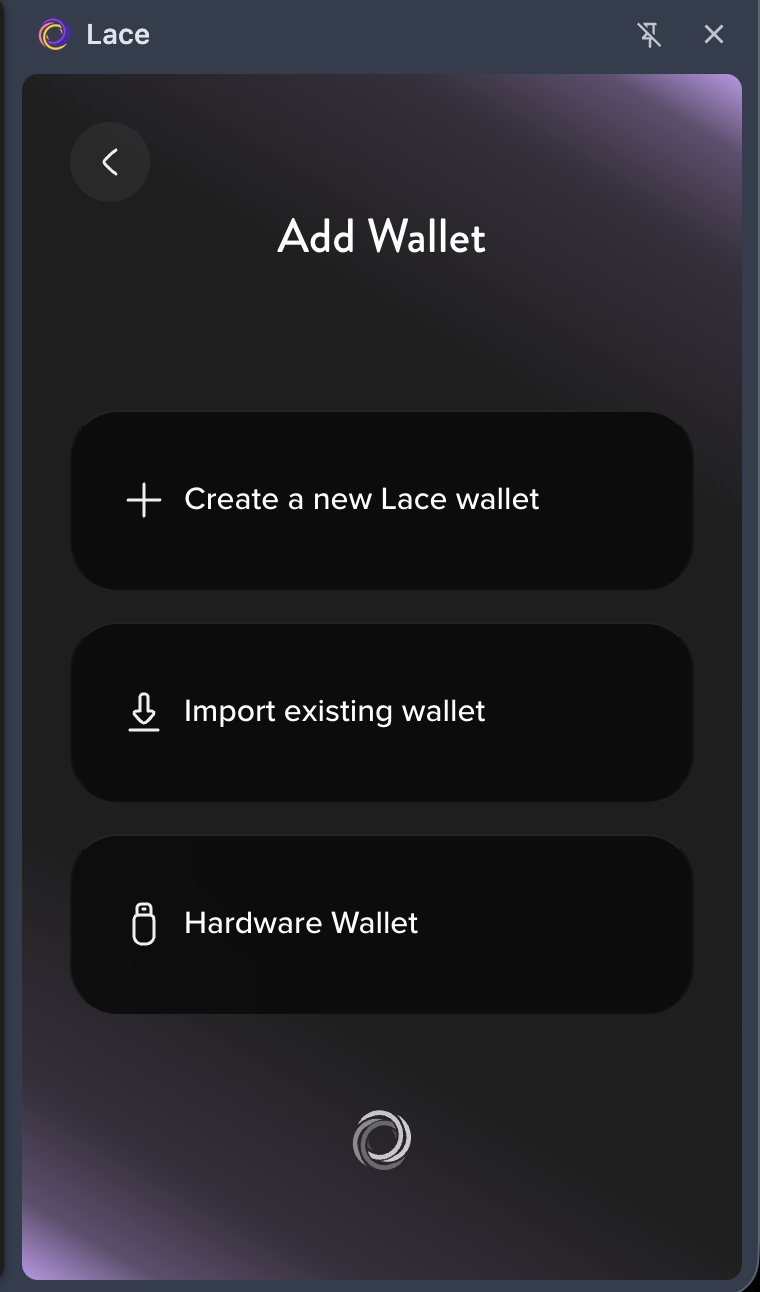 02 · add walletCreate a new Lace walletChoose Create a new Lace wallet. Import existing or Hardware Wallet stay for later.
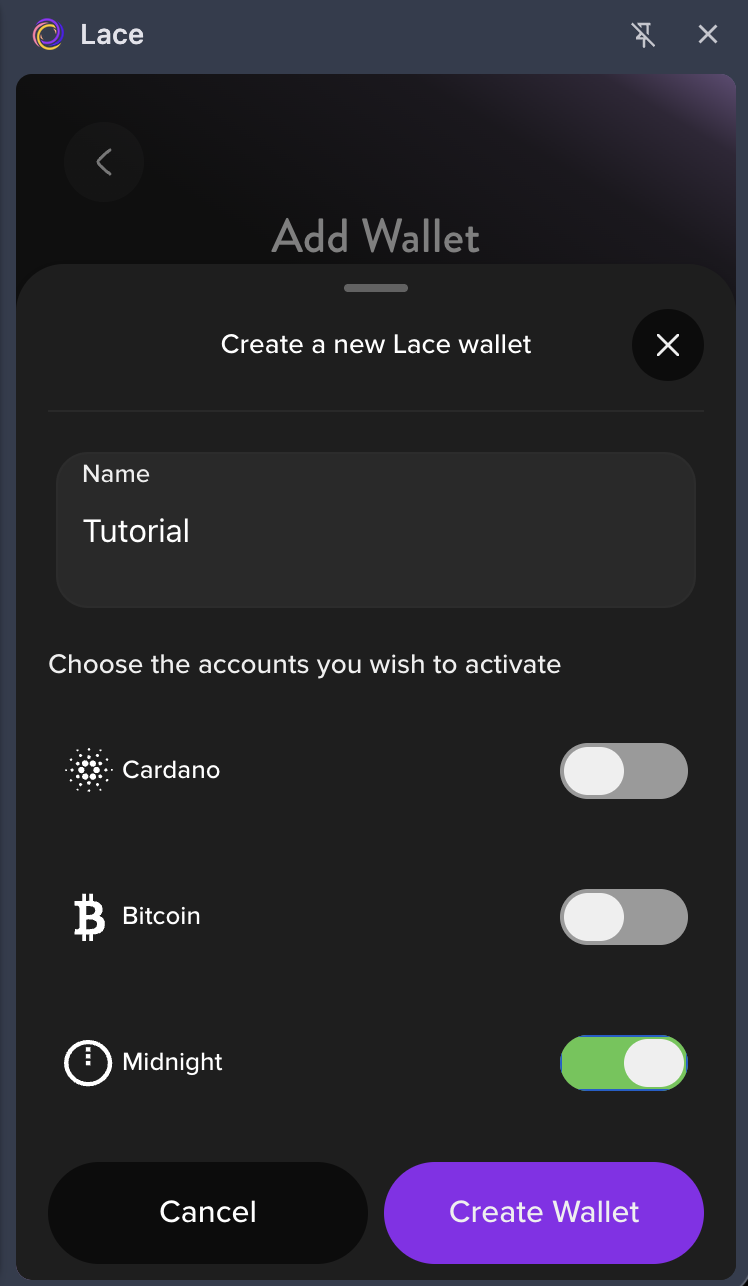 03 · choose midnightName it and enable MidnightGive the wallet a name, toggle Midnight on (Cardano and Bitcoin optional), then Create Wallet.
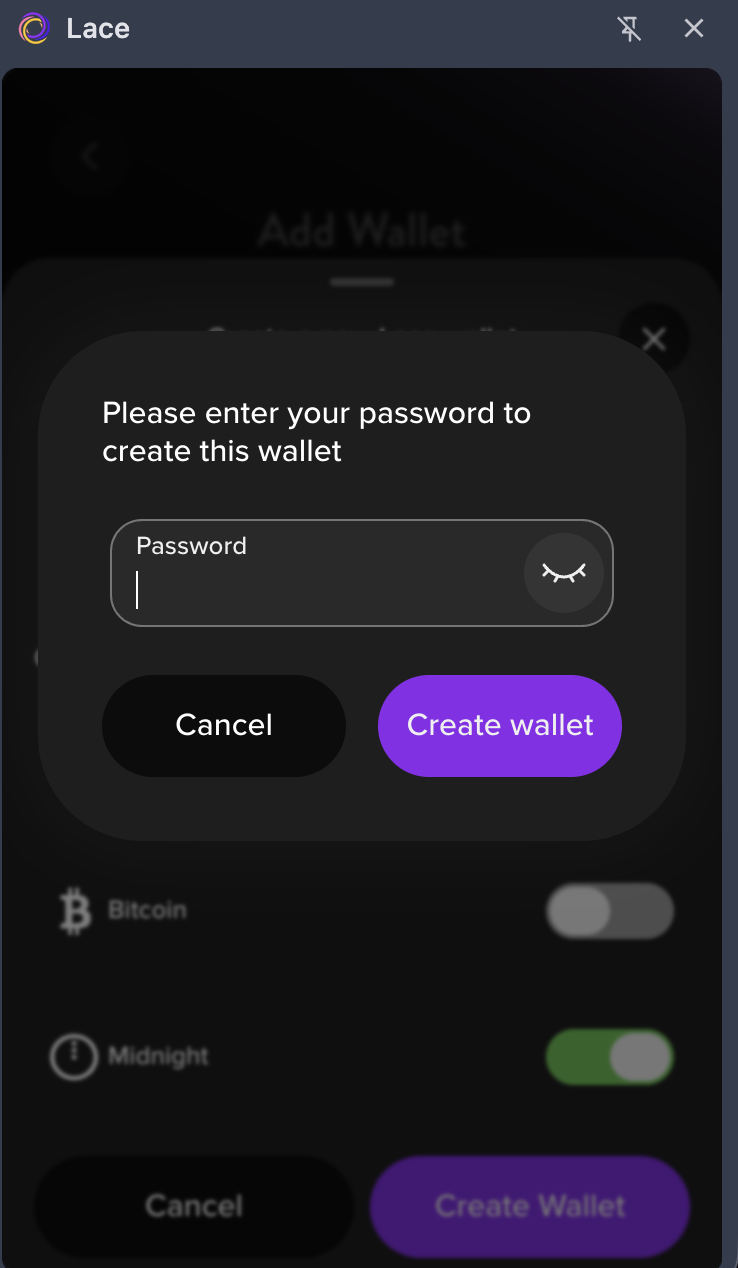 04 · passwordEnter your admin passwordConfirm with your Lace admin password to authorise wallet creation.
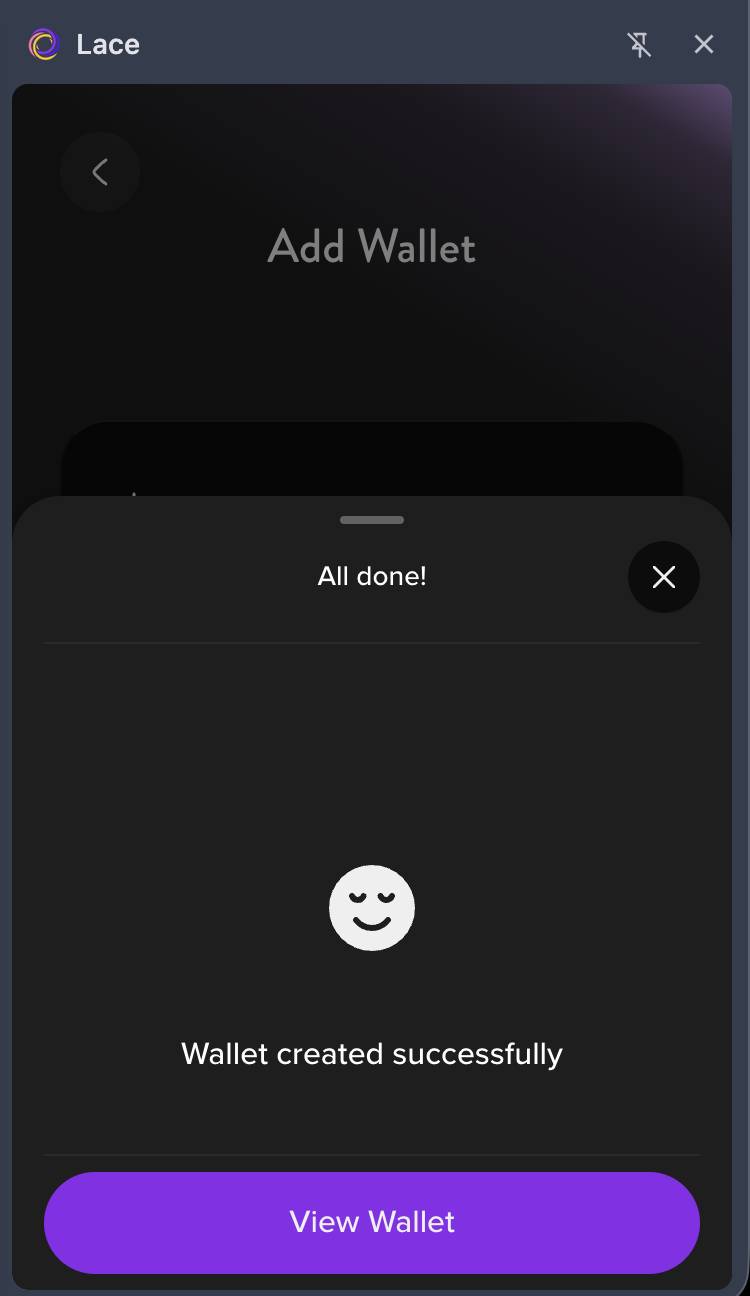 05 · all doneWallet createdYou'll see All done! — click View Wallet to jump straight in.
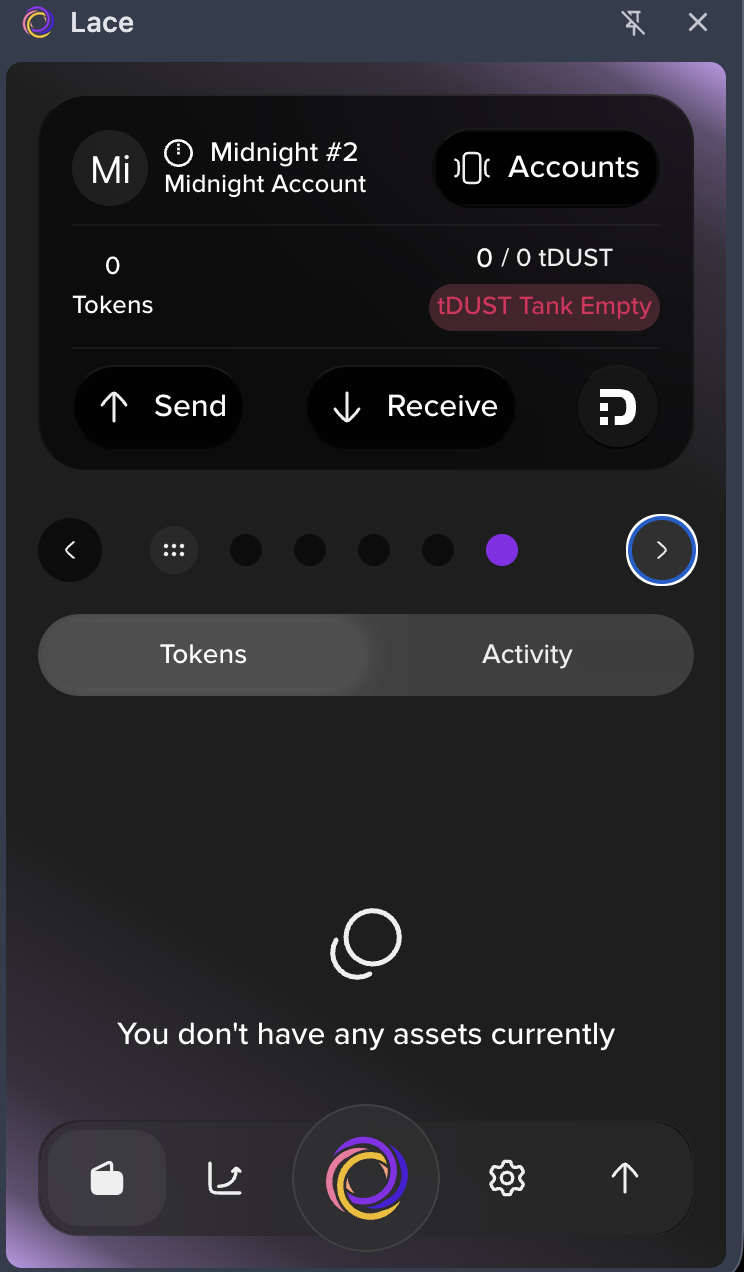 06 · wallet viewMidnight accountThe new Midnight #N account loads. The 0 / 0 tDUST · tDUST Tank Empty badge is expected — that's what the faucet fixes.
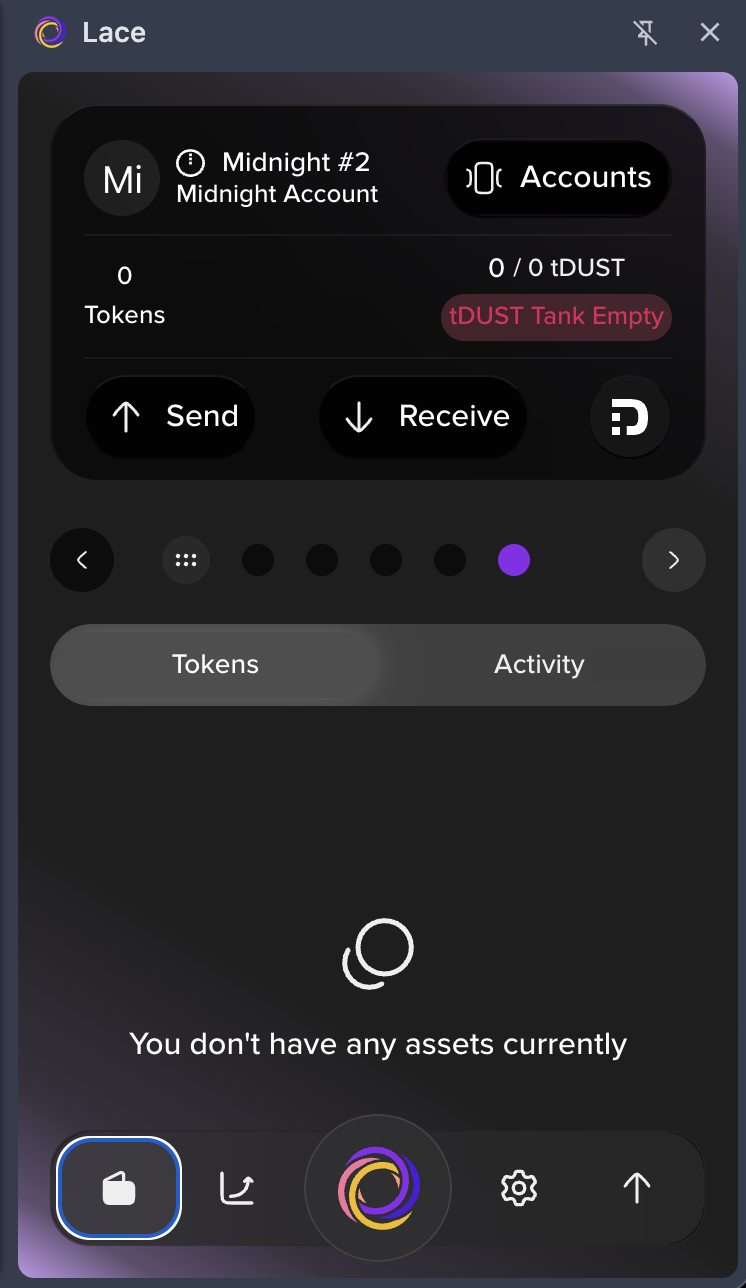 07 · wallet tabWallet tab selectedThe wallet icon on the far left of the bottom bar is your current view — nothing to click yet, just orientation.
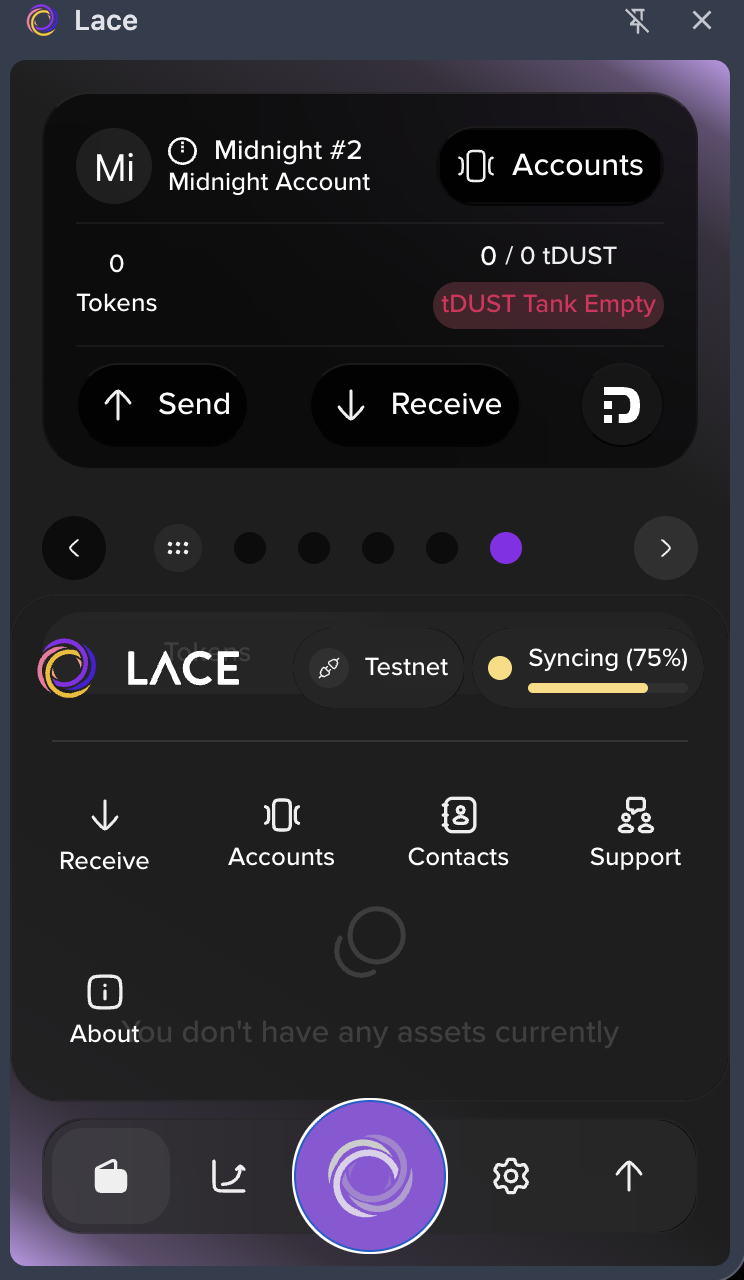 08 · center menuTap the center circleClick the large circle icon in the middle of the bottom bar to open the Lace quick menu (Receive, Accounts, Contacts, Support).
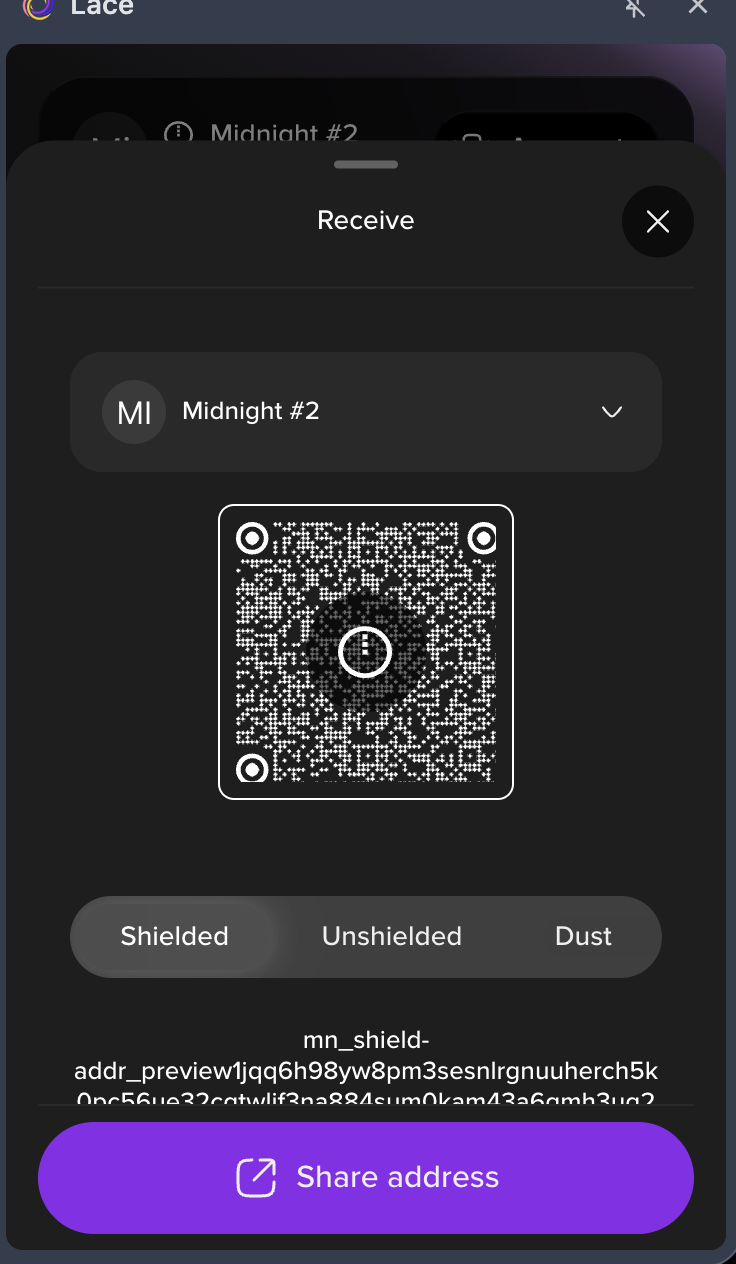 09 · receive · shieldedClick ReceiveChoose Receive. The default tab is Shielded (mn_shield-addr_…) — useful for private transfers.
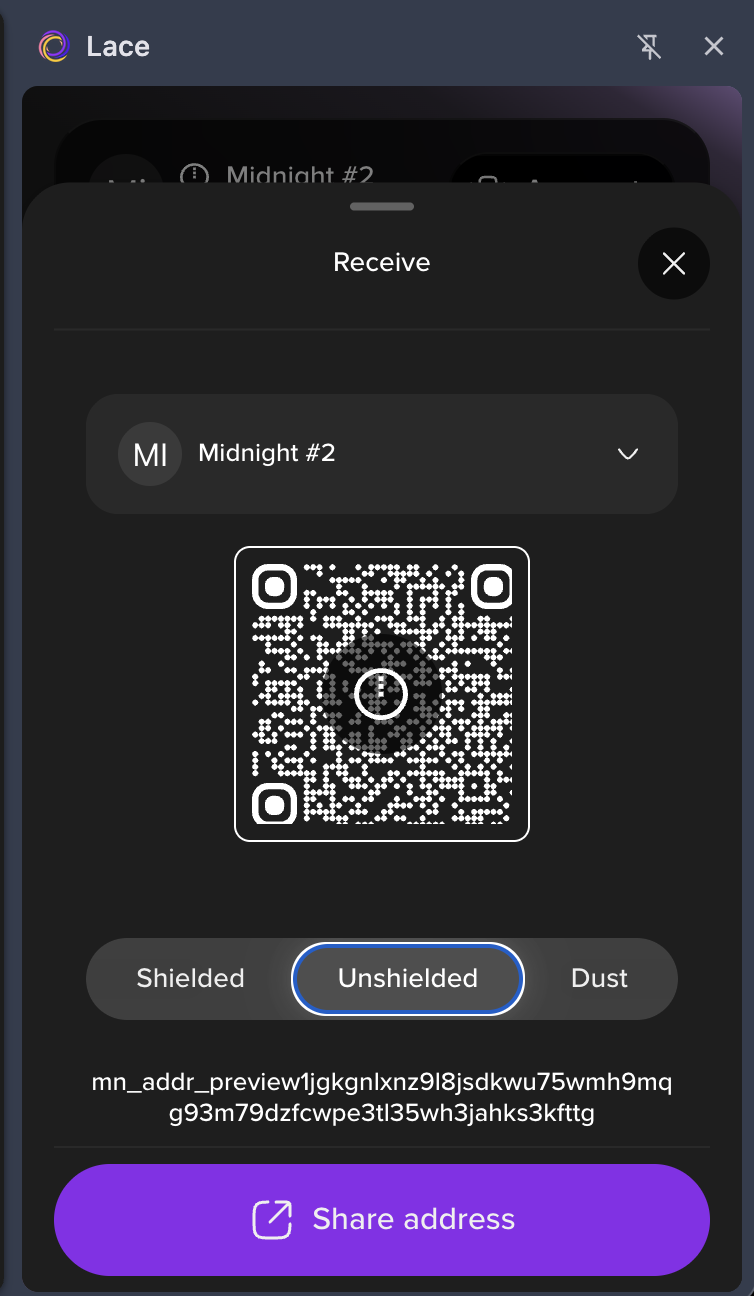 10 · receive · unshieldedSwitch to Unshielded → copySwitch to Unshielded, scroll down and copy the mn_addr_… address. Paste it into the faucet, then use the D icon next to Receive to convert tNIGHT → tDUST.
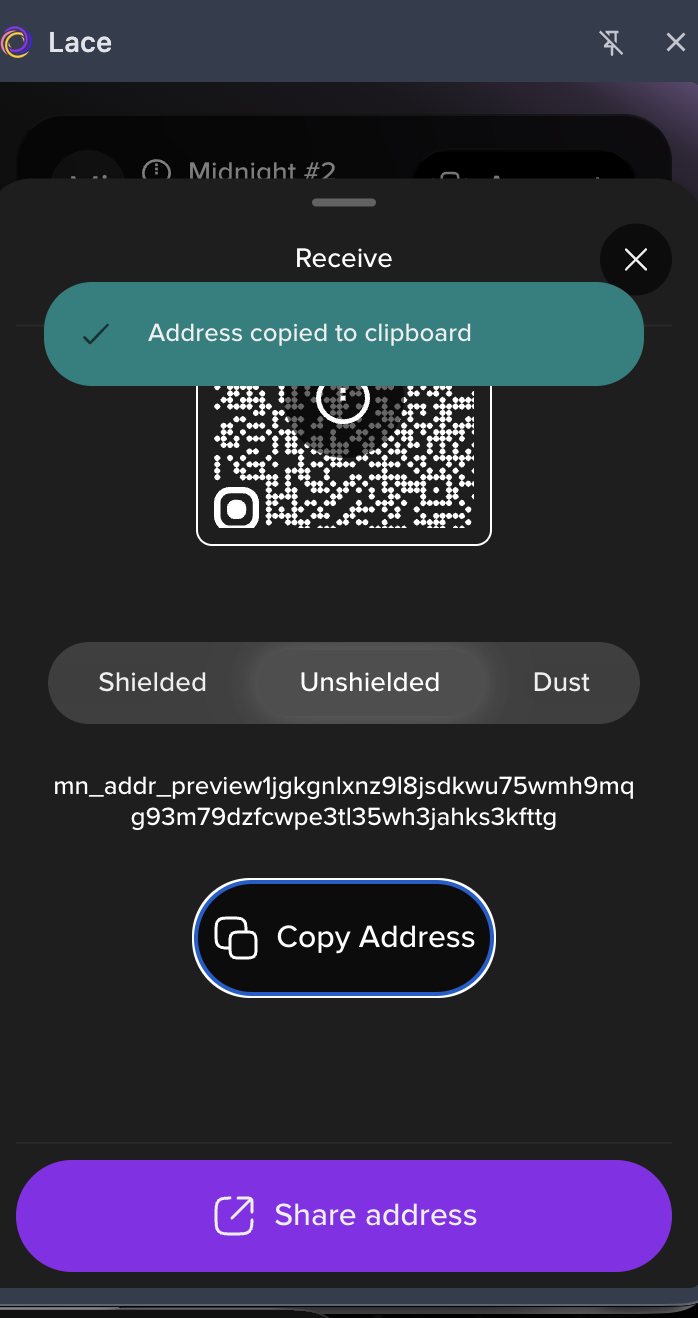 11 · address copiedAddress on the clipboardLace confirms Address copied to clipboard. You now have the mn_addr_preview… / preprod… string ready for the faucet.
Screenshots captured from the Lace browser extension. Wallet UX and additional context: Midnight Docs — Acquire tokens ↗.
midnight-wallet-cli — one command.
Skip wiring up derivation yourself. The community midnight-wallet-cli turns a 64-char hex master seed straight into the bech32 unshielded address the faucet wants. Recommended by Midnight dev-rel (norm) in #dev-chat. Our scripts/derive-unshielded-address.mjs remains as an offline fallback.
npm i -g midnight-wallet-cli

# 64-char hex master seed (32 bytes) — NOT your mnemonic
mn address --seed <64-hex-master-seed> --network preprod
# → mn_addr_preprod1…  (paste into the preprod faucet)

# Verify funds landed
mn balance <mn_addr_preprod1…> --network preprod
--networkacceptspreprod,preview,undeployed,mainnet.- Seed must be the 64-char hex master seed (32 bytes) — not the BIP-39 mnemonic.
- Prints the unshielded address (
mn_addr_…) the faucet needs. The shielded address (mn_shield-addr_…) is a separate identity and is not what the faucet uses. - Run this locally — never paste a seed into chat, screenshots, or issue trackers.
Fund the wallet from the faucet.
Two public faucets for the testnets, and one local funding path for the Undeployed network. Paste the unshielded address you just copied, solve the Cloudflare check, and click Request tokens. For a local Undeployed stack, skip the public faucet and use the local funding tool instead.
The local node mints unlimited tDUST to the genesis wallet. To fund your own Lace wallet, use the local Midnight network tool:
- Fund from a config file (mnemonics) via the
npm startinteractive menu. - Fund by public key (unshielded Bech32 addresses) — 50,000 tNIGHT per address, then register for DUST in Lace.
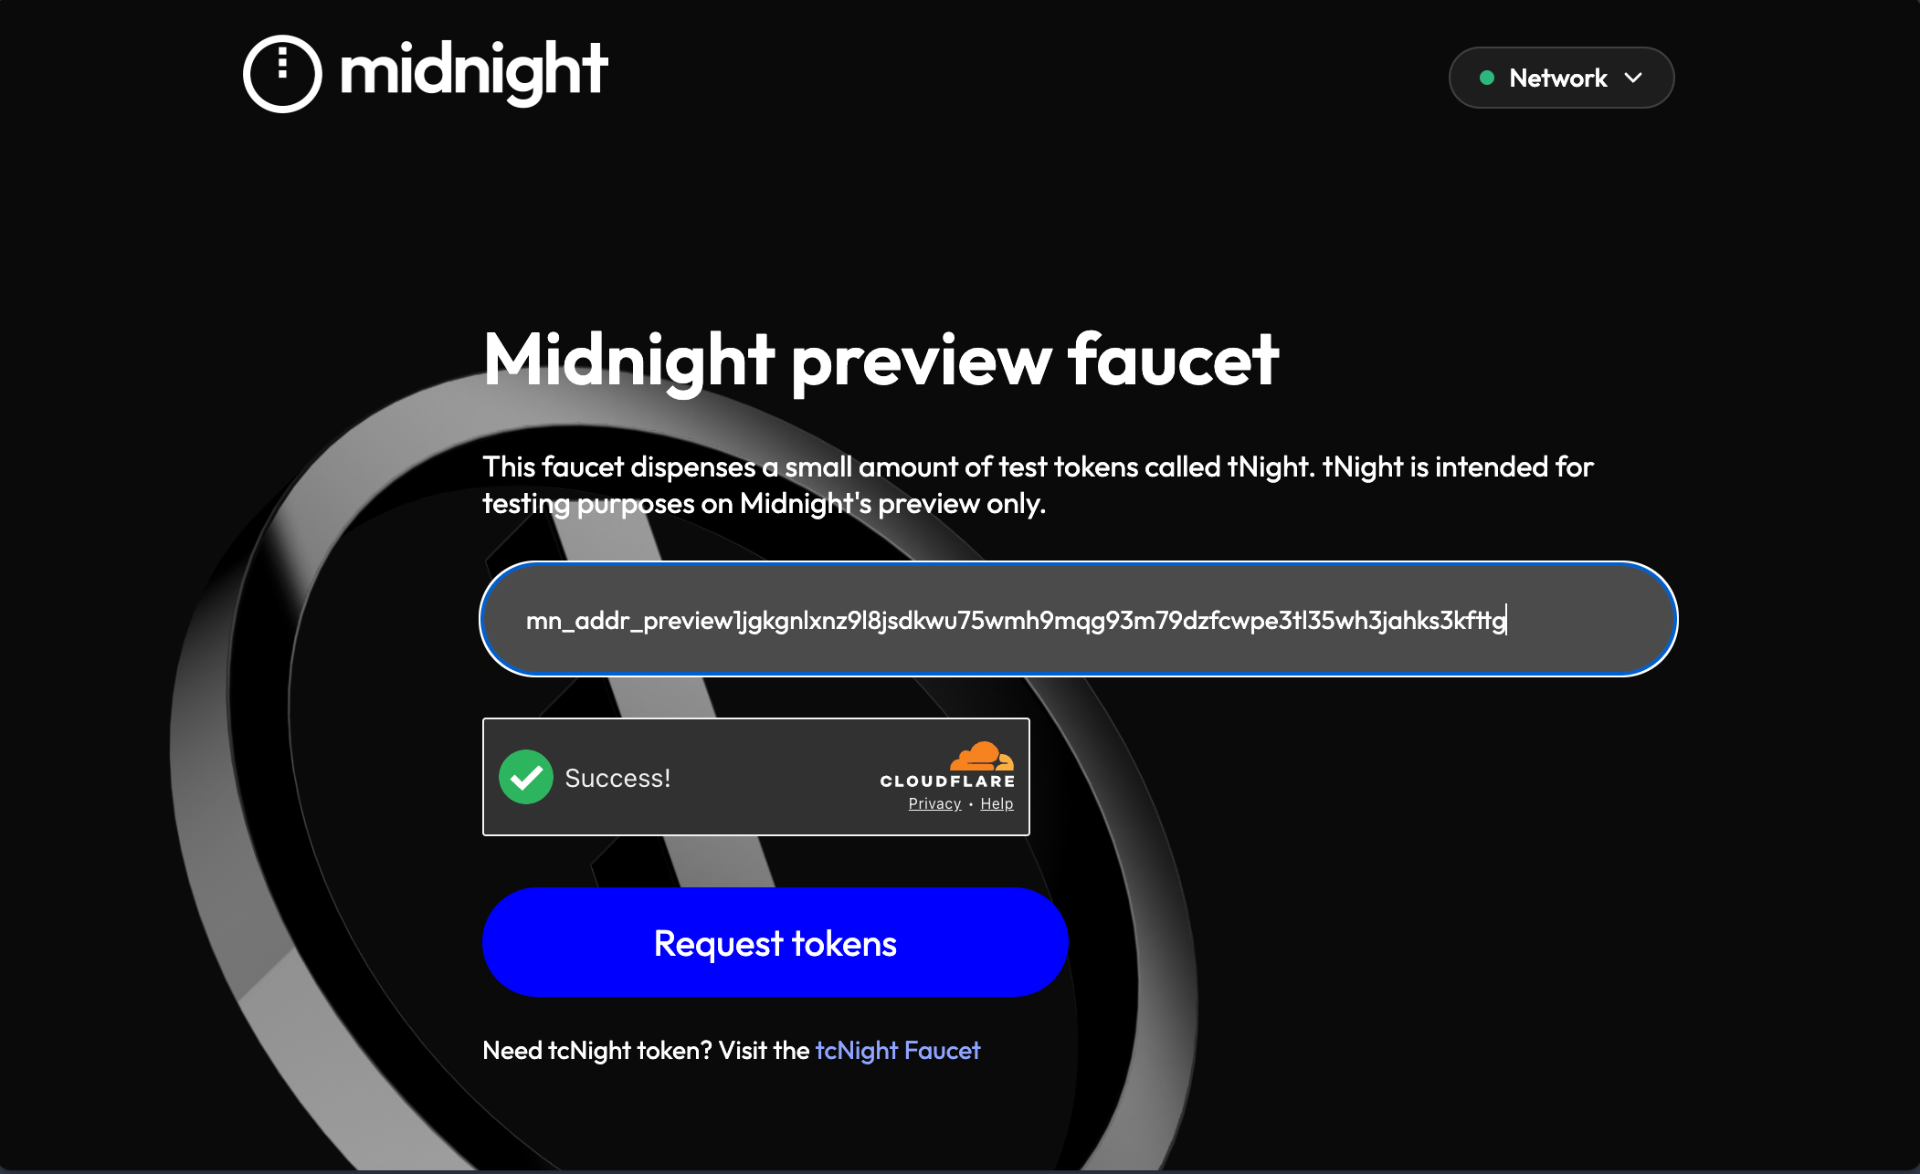 01 · paste addressOpen the matching faucetGo to the preview or preprod faucet, paste your unshielded address, solve the Cloudflare check, then click Request tokens.
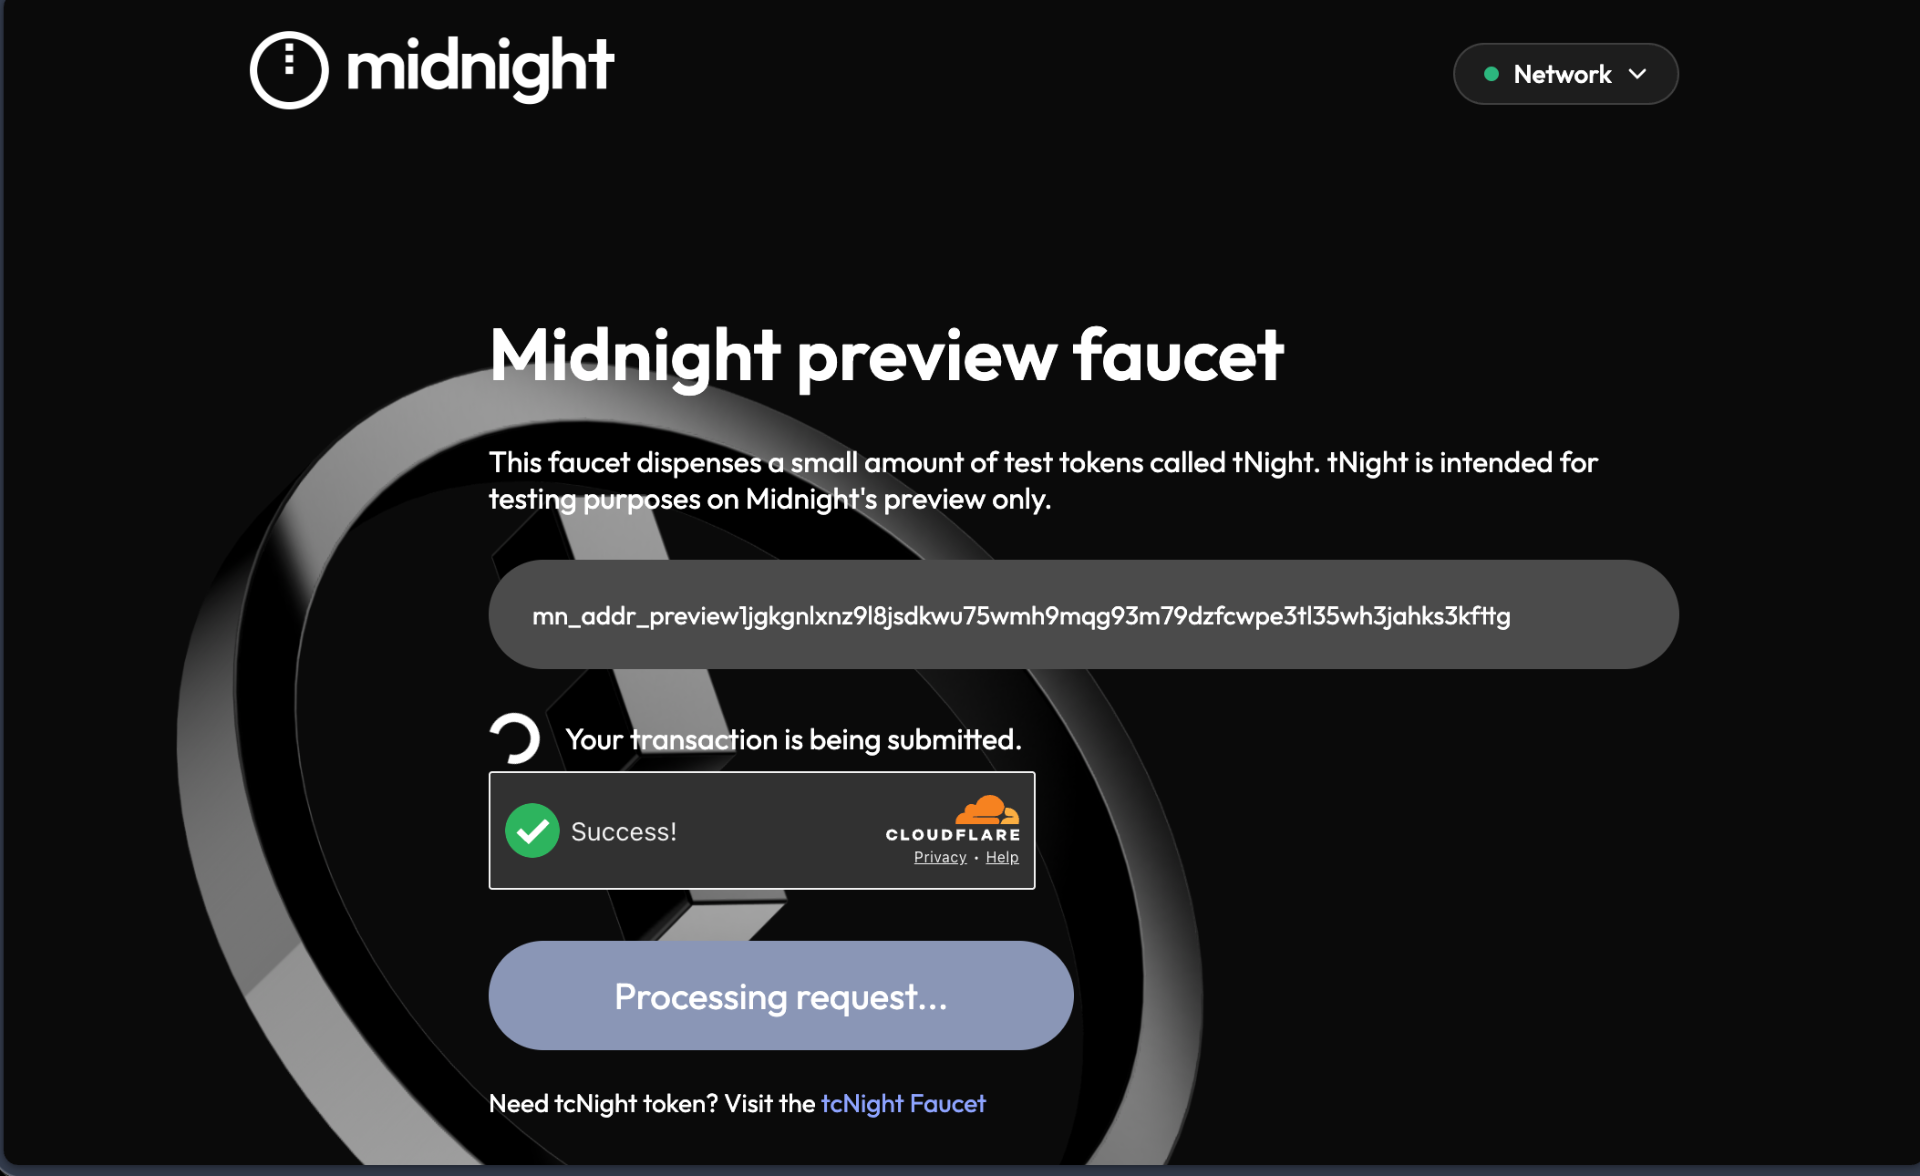 02 · processingTransaction submittedThe button flips to Processing request… and Your transaction is being submitted. tNIGHT usually lands within a block or two.
Point Lace at Preview, Preprod, or Undeployed.
Make sure Lace is on the same Midnight network as the faucet or local stack you used. Open Settings from the cogwheel on the bottom bar, choose Network, and confirm. If you are running the DApp locally on localhost, select the Undeployed network and point the RPC at ws://localhost:9944.
- Lace → Settings → Network → Custom → RPC
ws://localhost:9944. - Start the local stack:
bun scripts/midnight-standalone.mjs up. - Run the preflight checks to confirm all four endpoints are green.
- Need funds? Use the local Midnight local network tool to fund your Lace wallet.
Partial fix: run Lace expanded.
Cogwheel → Default View Mode → Expanded → Confirm. Lace opens in a full browser tab from now on, which fixes most clipped panels.
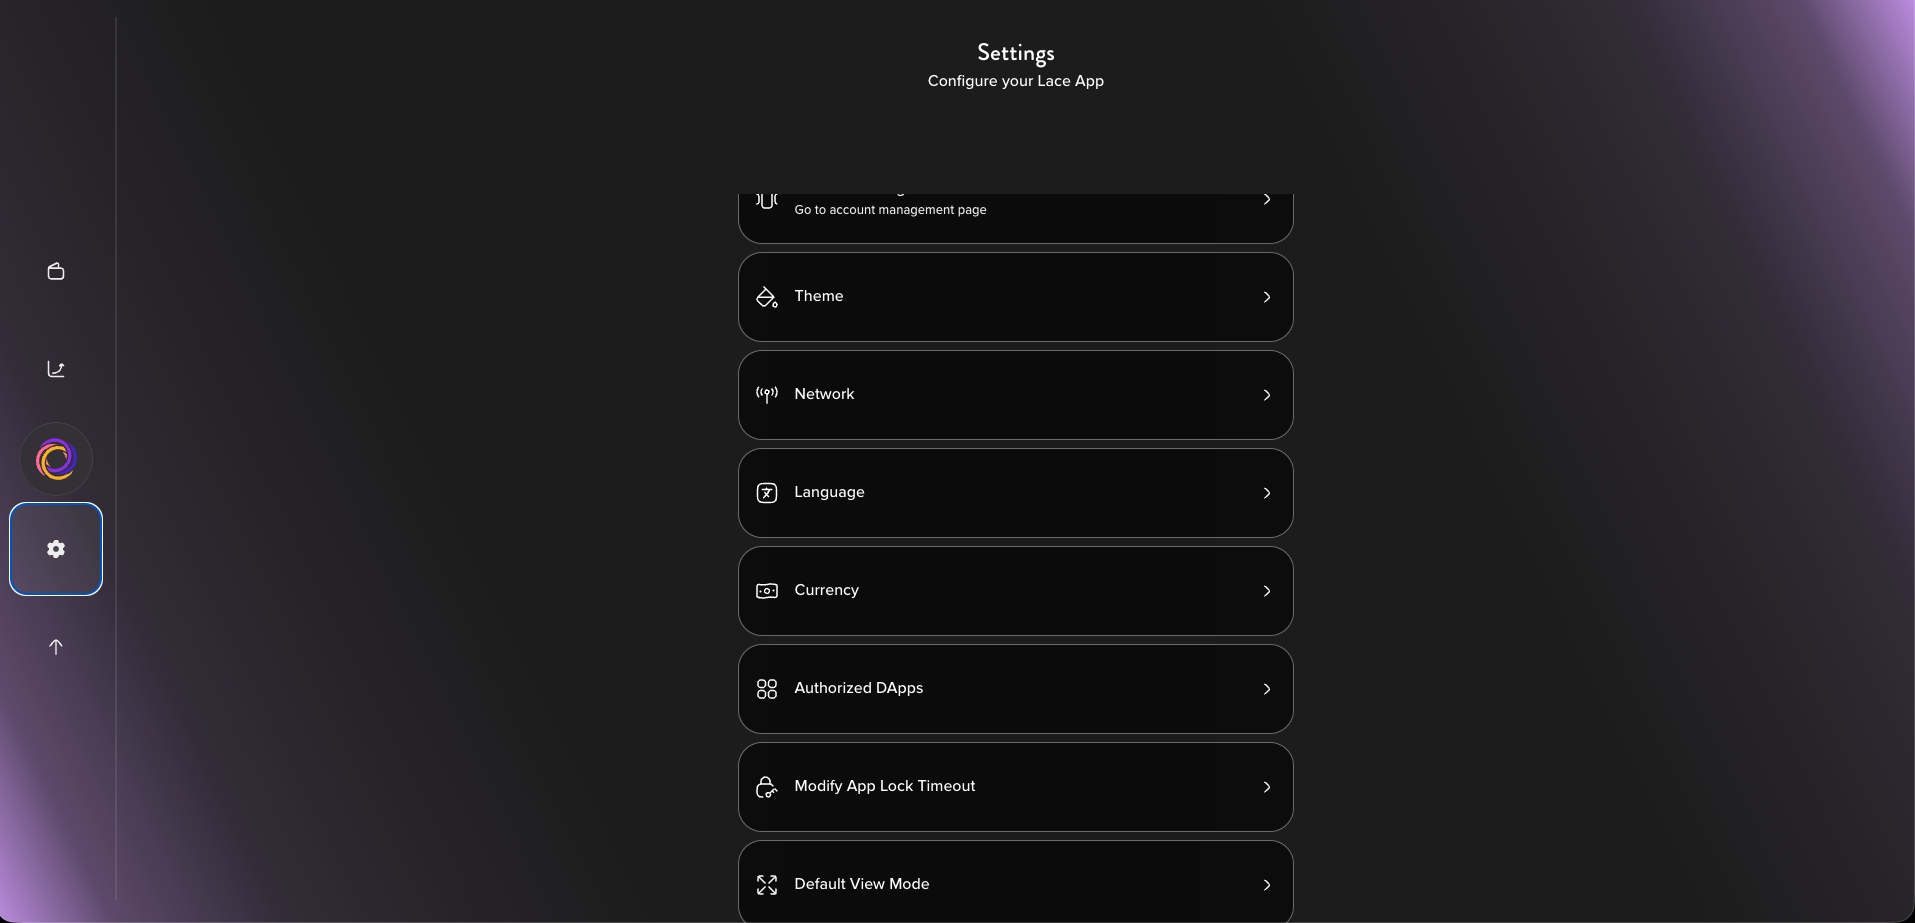 01 · settingsCogwheel → Default View ModeOpen Settings from the cogwheel and scroll to Default View Mode at the bottom of the list.
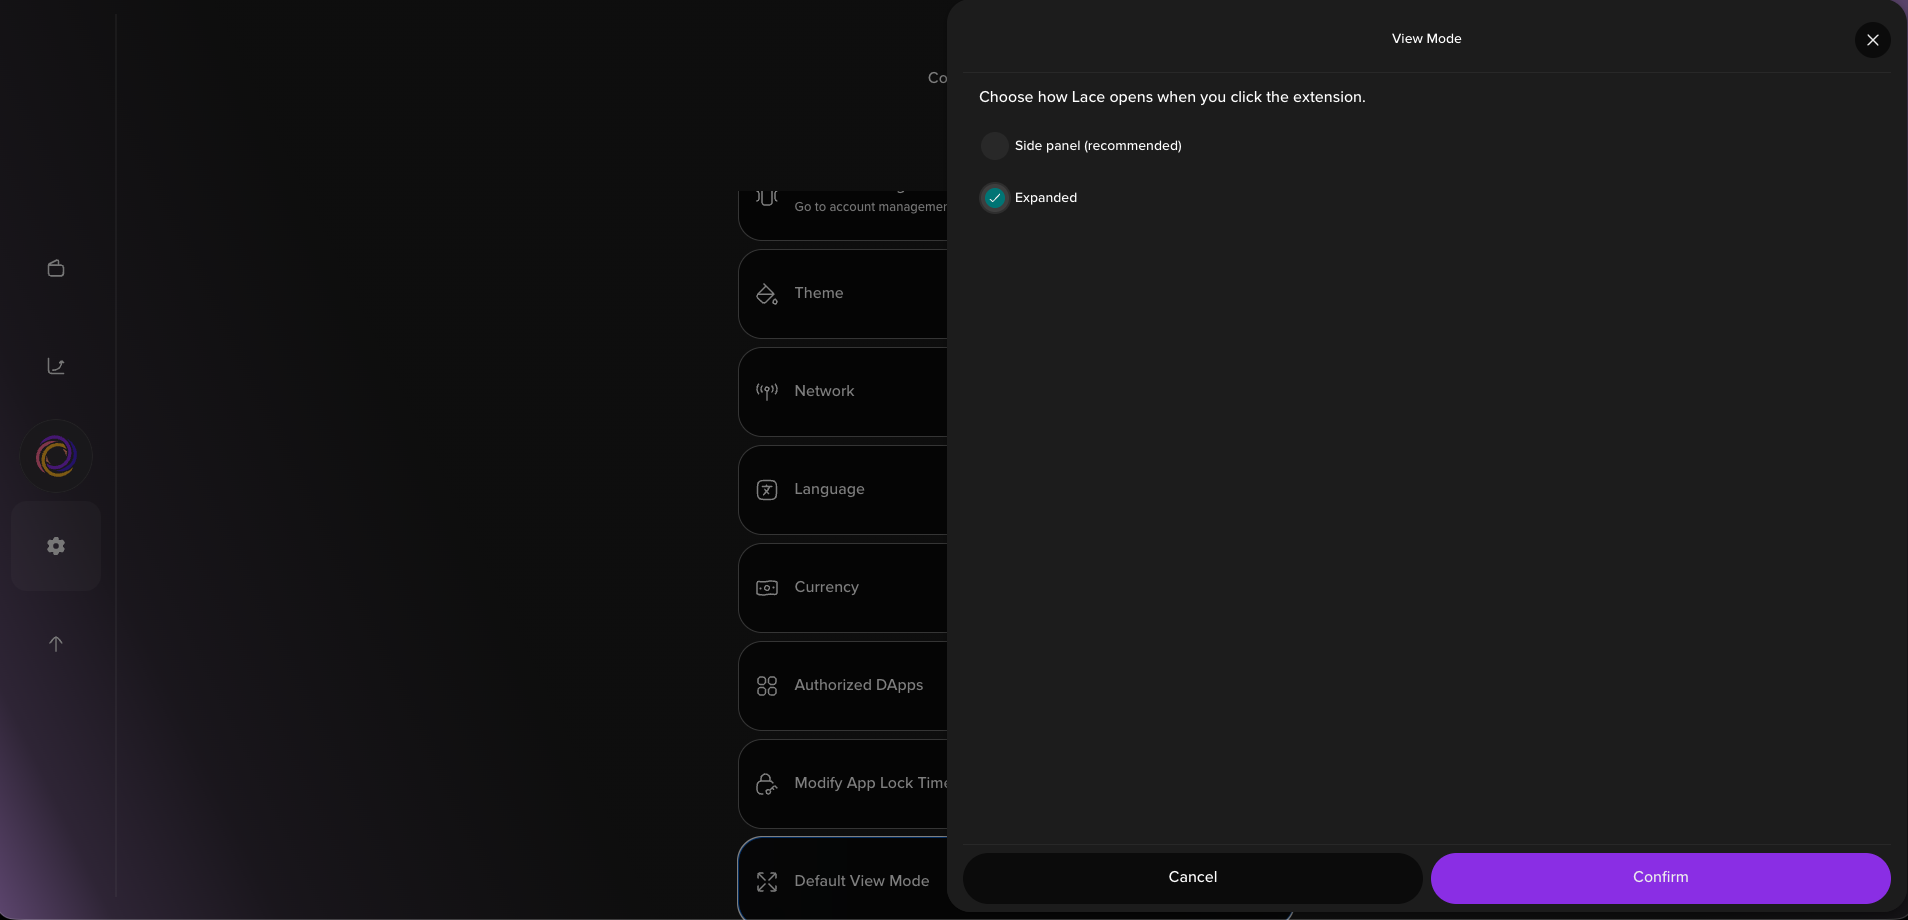 02 · pick expandedChoose Expanded → ConfirmSwitch from Side panel (recommended) to Expanded, then Confirm. Lace now opens in a full browser tab.
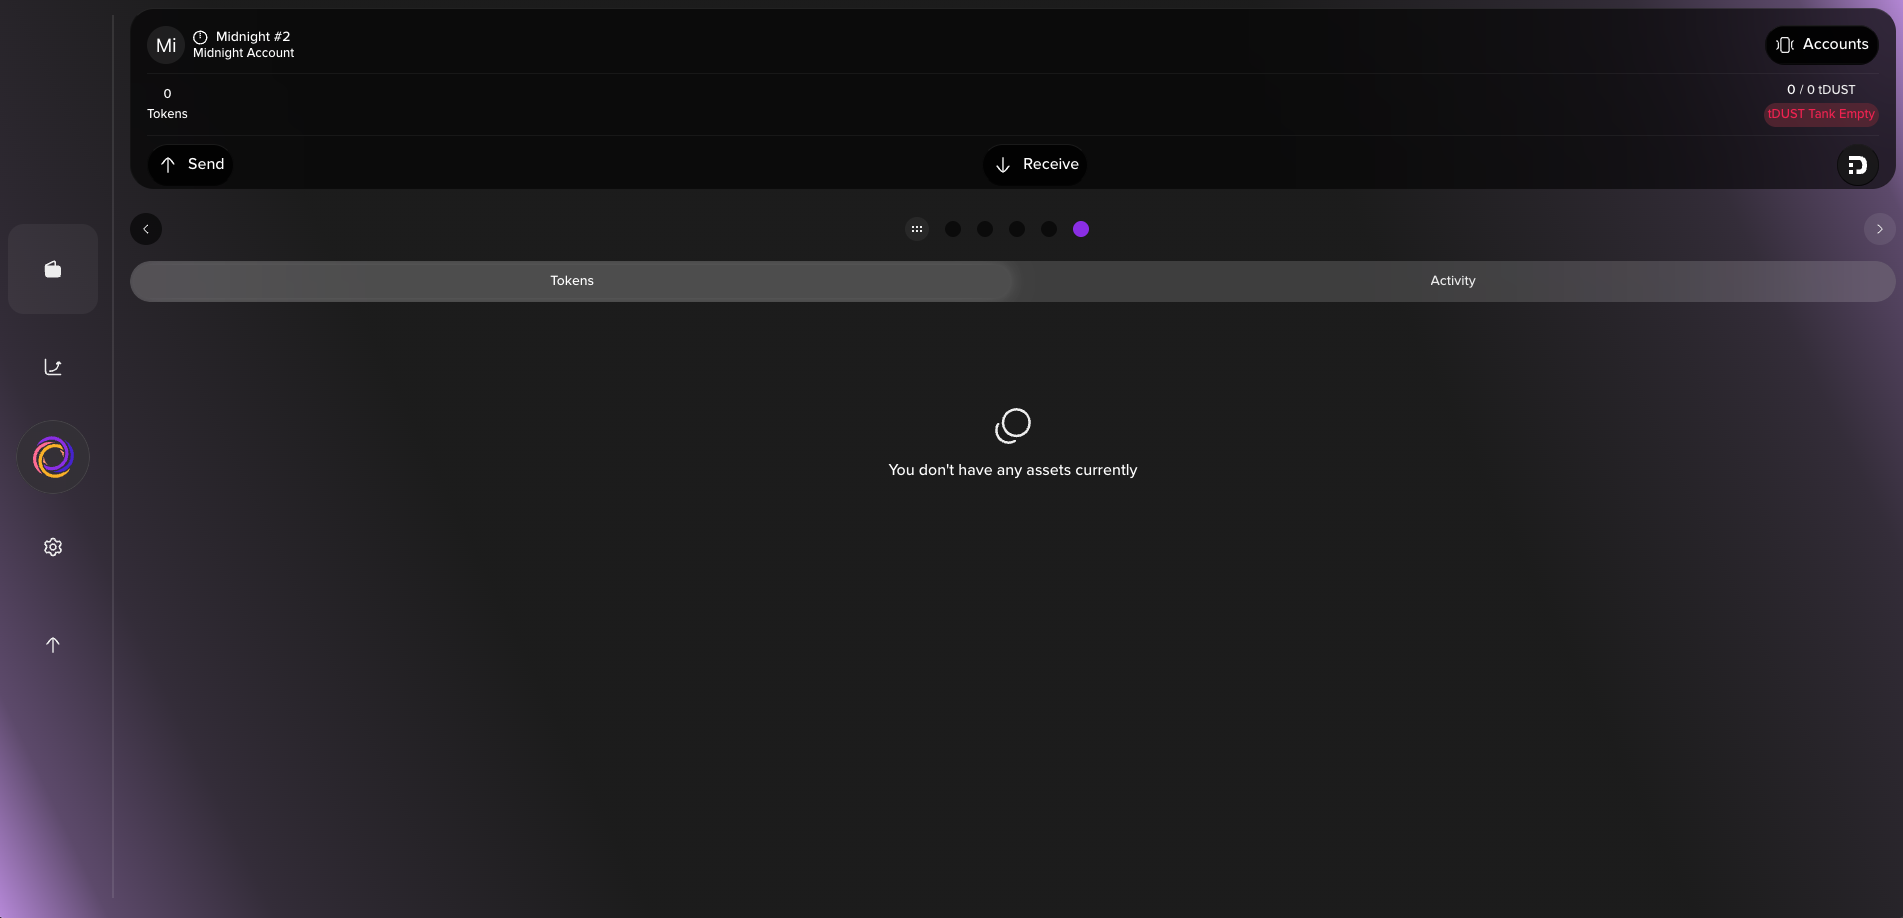 03 · full canvasNo more truncationIn Expanded mode the Network modal (and every other panel) has room to render — all three Midnight options stay visible.
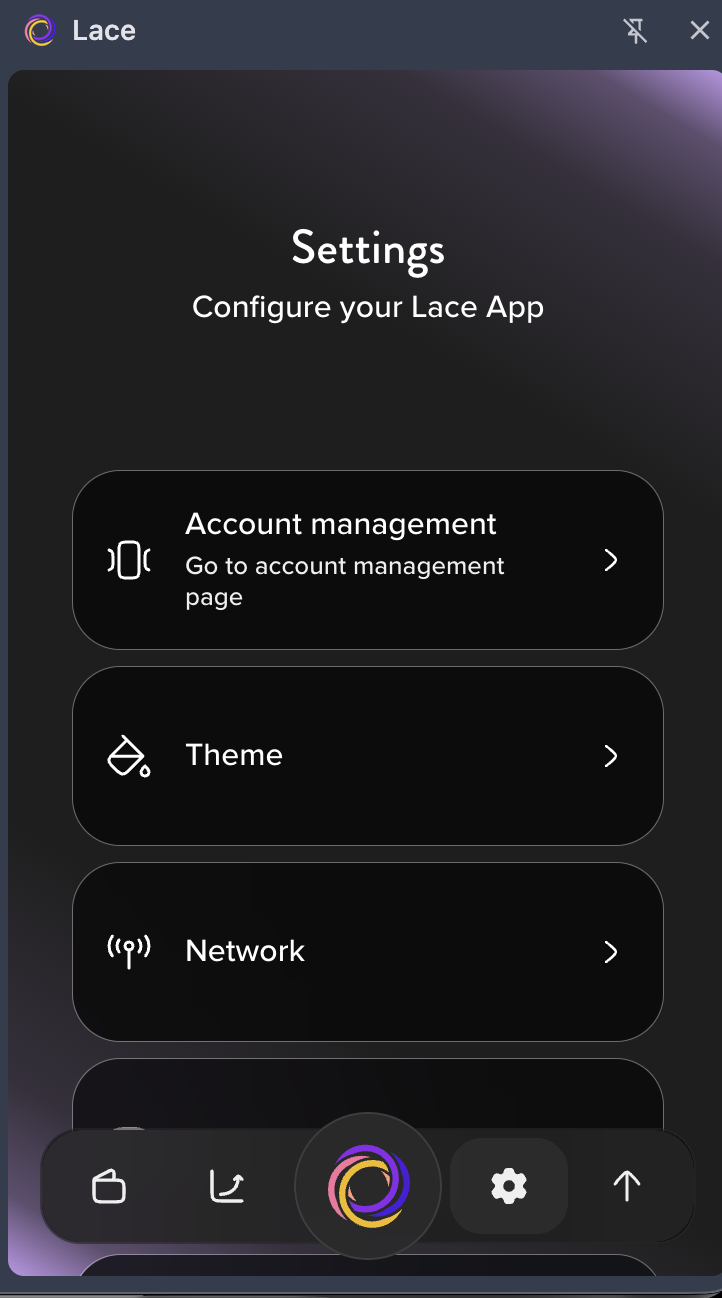 01 · settingsOpen Settings → NetworkBack in Lace, tap the cogwheel on the bottom bar to open Settings, then choose Network.
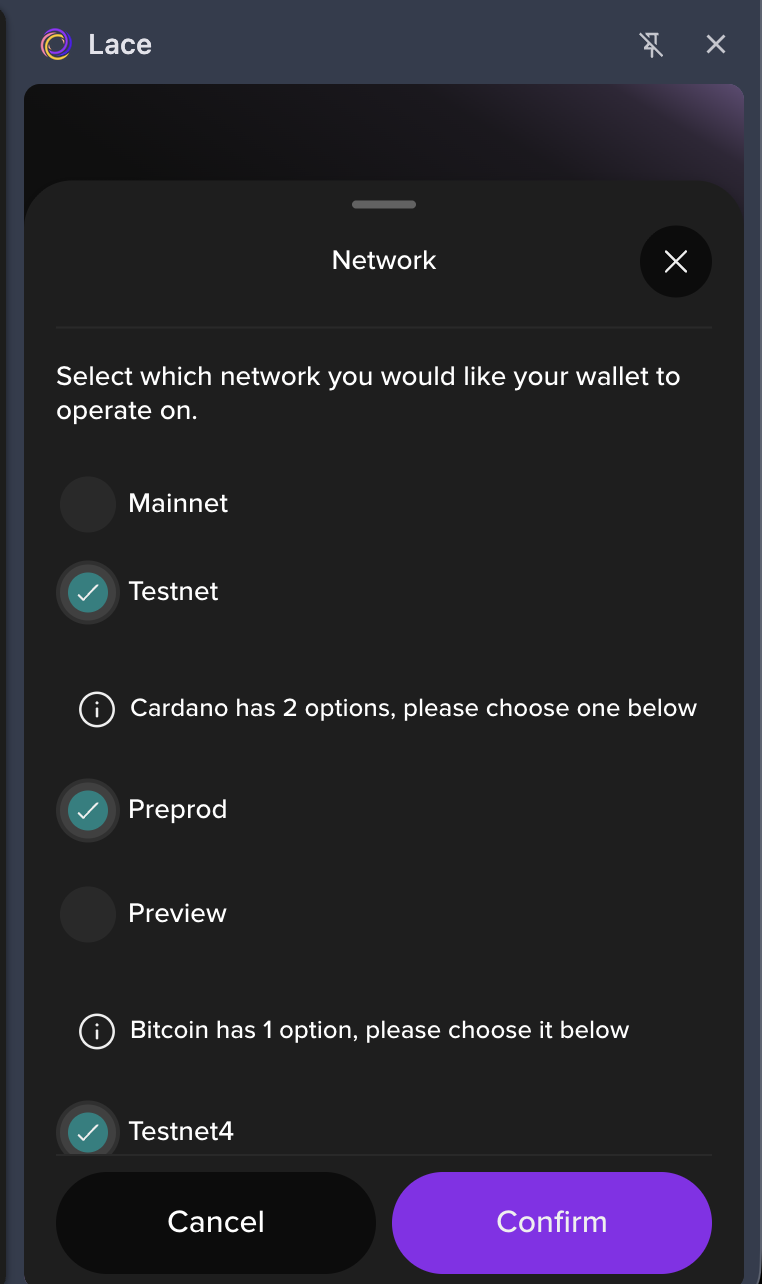 02 · pick testnetTestnet → Preprod / Preview / CustomSelect Testnet. Cardano offers Preprod or Preview — pick the one that matches the Midnight network you want. For a local Undeployed stack, choose Custom and enter ws://localhost:9944.
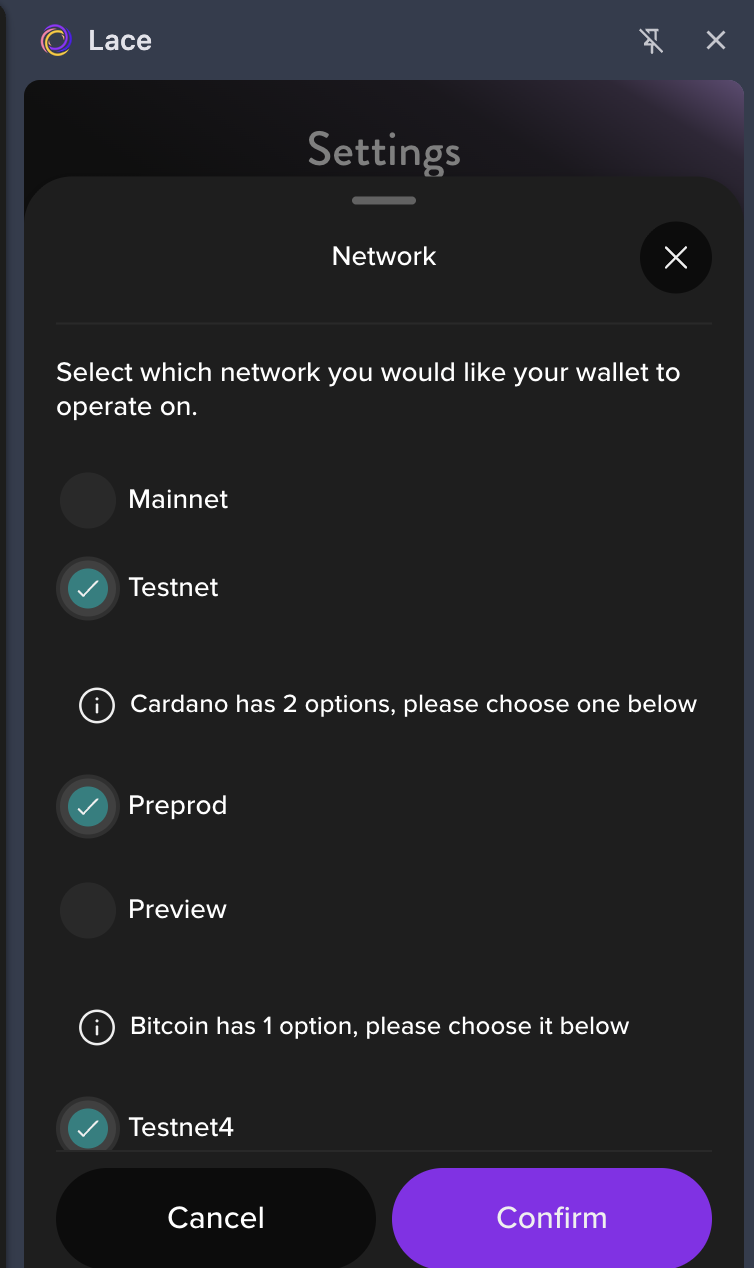 03 · small-screen bugModal can truncateHeads up: on a small laptop screen the Network modal cuts off before the Midnight section. If you only see Cardano and Bitcoin, resize the window.
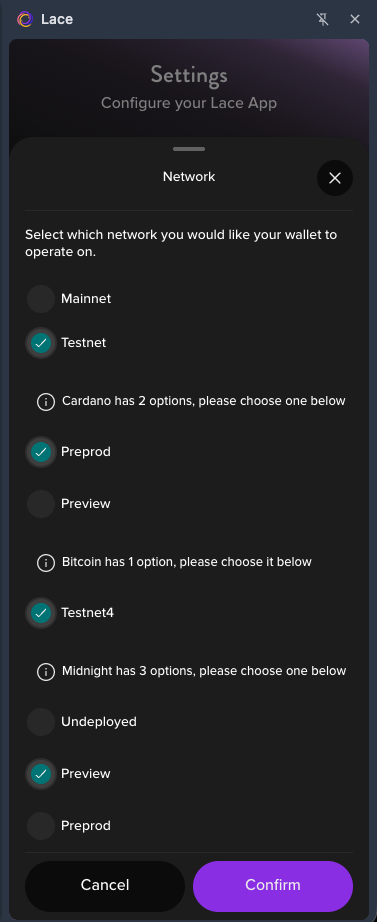 04 · midnight optionsFull modal — 3 Midnight optionsOn a larger viewport the modal scrolls to reveal Midnight has 3 options: Undeployed, Preview, Preprod. Pick the one that matches the network you are building on. For local development, choose Undeployed.
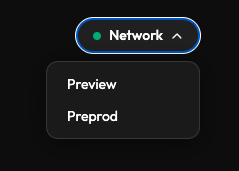 05 · top-bar switchQuick switch from the top barOnce configured, the Network pill in the top-right lets you flip between Preview and Preprod without reopening Settings. The Custom/Undeployed entry will also be available if you added it.
Point Lace at your proof server.
Settings → Midnight opens the Midnight-specific config. Two things live here: Proof Server (where ZK proofs are generated) and Node address (the RPC Lace queries).
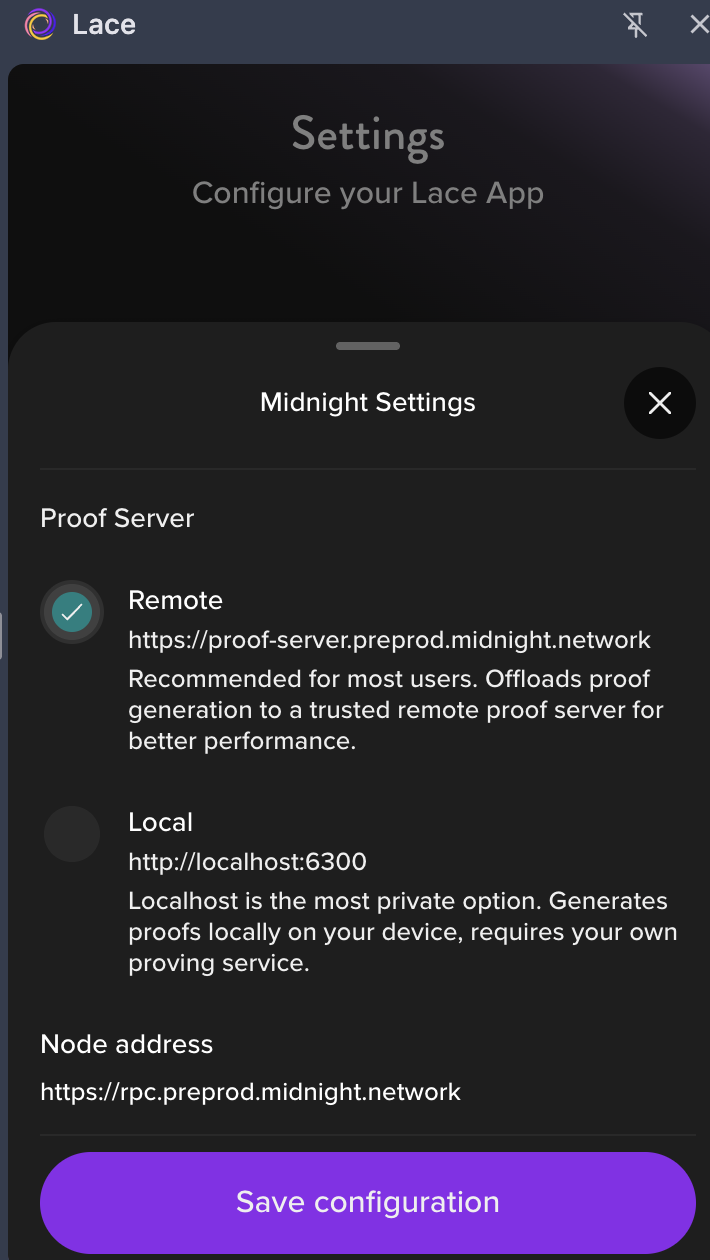
Default. Uses https://proof-server.<network>.midnight.network. Fastest for casual signing — a trusted remote generates the proof for you. Fine for most DApp interactions.
http://localhost:6300 — this is the Docker proof server you run for the deploy script. Most private (proofs never leave your machine) and required if you want Lace signing to hit the same prover the script uses. Start it with:
docker run -d -p 6300:6300 midnightntwrk/proof-server:8.1.0 midnight-proof-server -v
Leave as https://rpc.<network>.midnight.network unless you're running your own Midnight node. This is the RPC Lace uses to read state and submit txs.
For a local Undeployed stack, point this to ws://localhost:9944 — the WebSocket RPC of the local Midnight node. Lace treats it as a Custom network, and it must be green in the preflight checks before it will connect.
Click Save configuration after any change — Lace re-syncs against the new endpoints immediately.
Turn tNIGHT into tDUST.
The faucet only drips tNIGHT. Deploys and shielded txs spend tDUST — so you have to designate your tNIGHT once. In your wallet, click the D icon next to Receive, click Send twice, and enter your admin password.
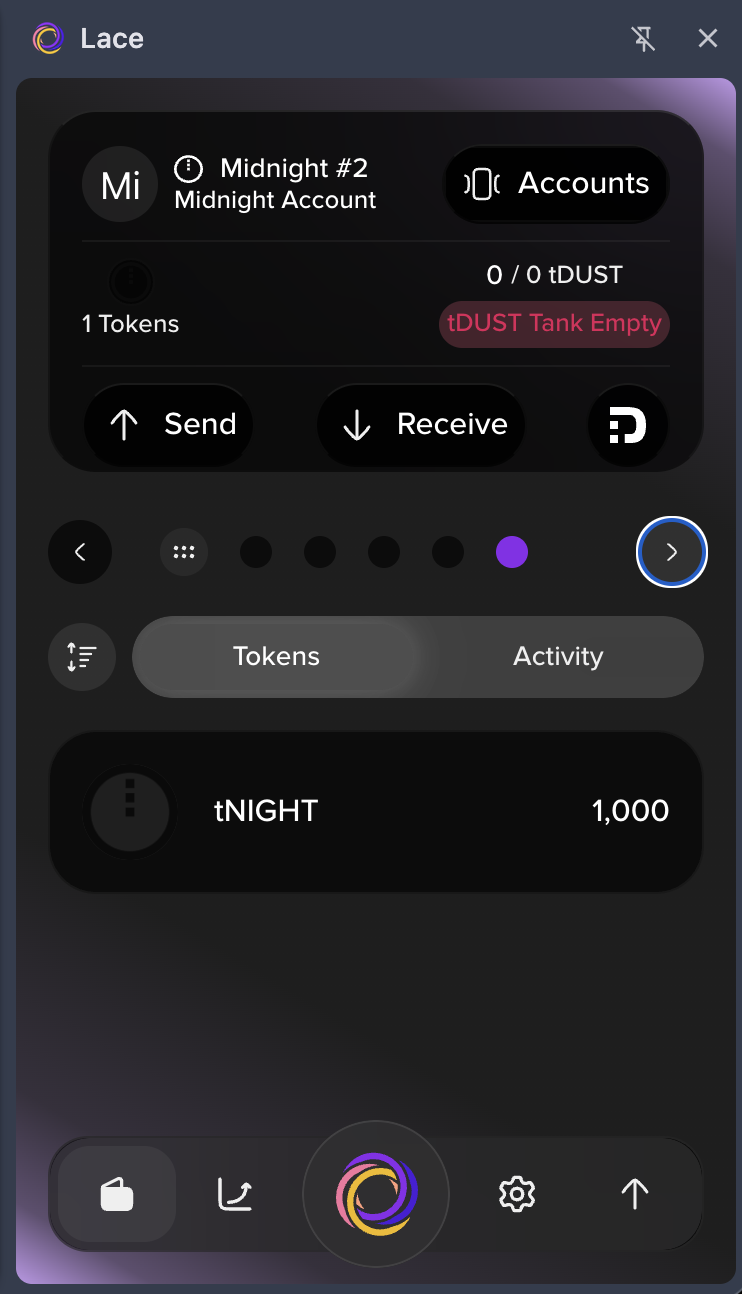 01 · tank emptyTap the D icon next to ReceiveWith tNIGHT in the wallet but 0 / 0 tDUST, click the small D icon to the right of Receive to open Generate tDUST.
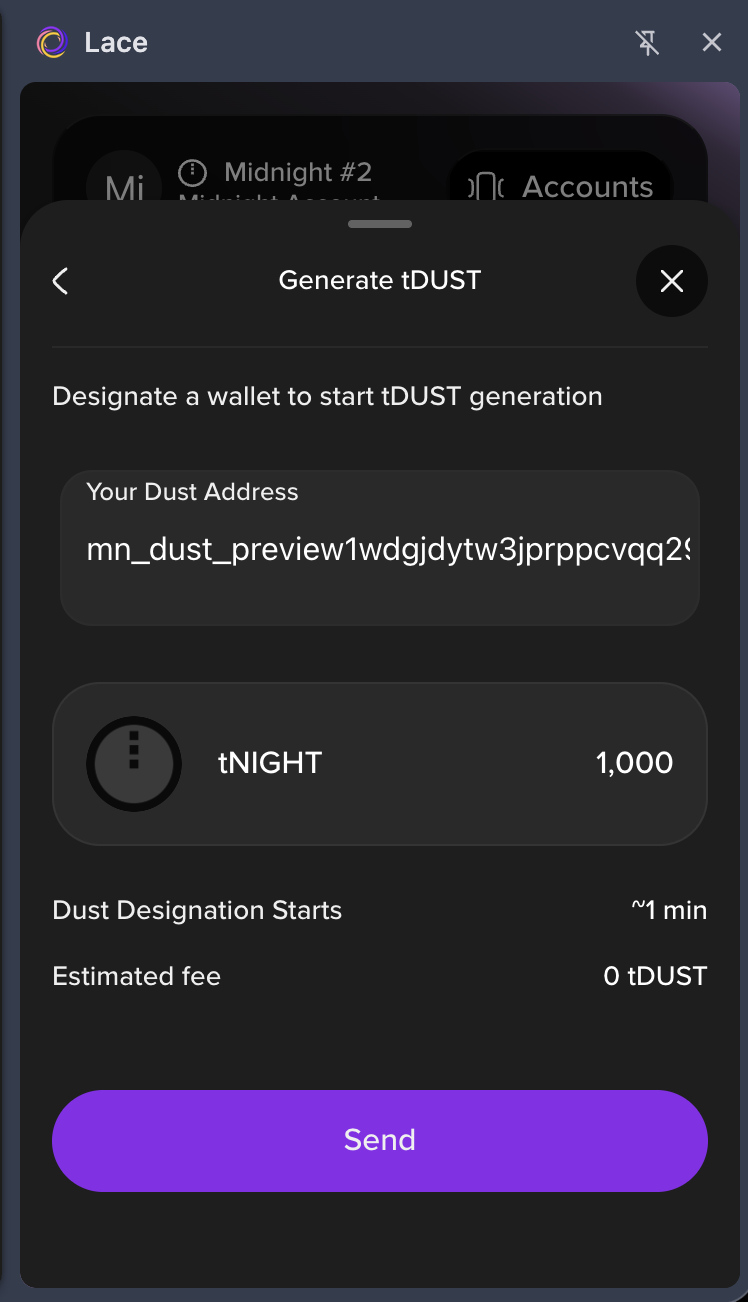 02 · generate tdustSend #1 — designate walletThe Generate tDUST sheet shows your Dust Address and full tNIGHT balance. Click Send to designate it for tDUST generation.
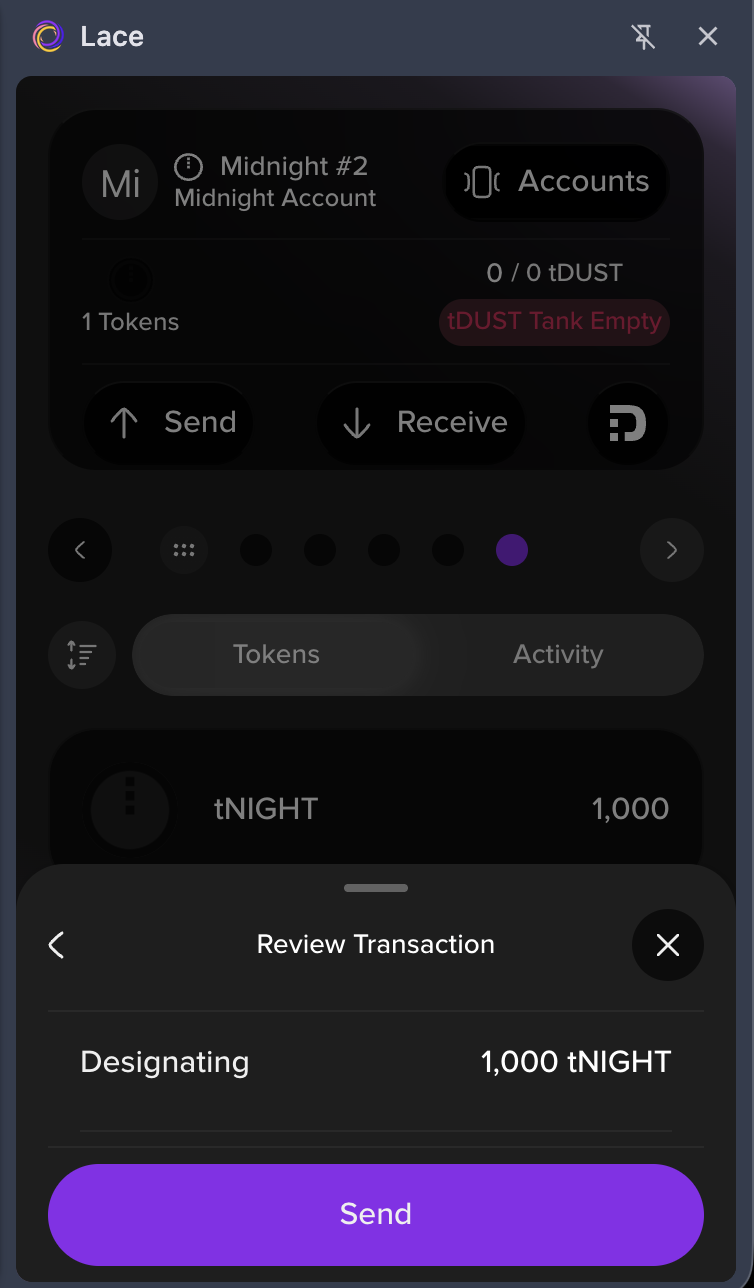 03 · reviewSend #2 — review & confirmReview Transaction confirms you're designating 1,000 tNIGHT. Click Send again to submit.
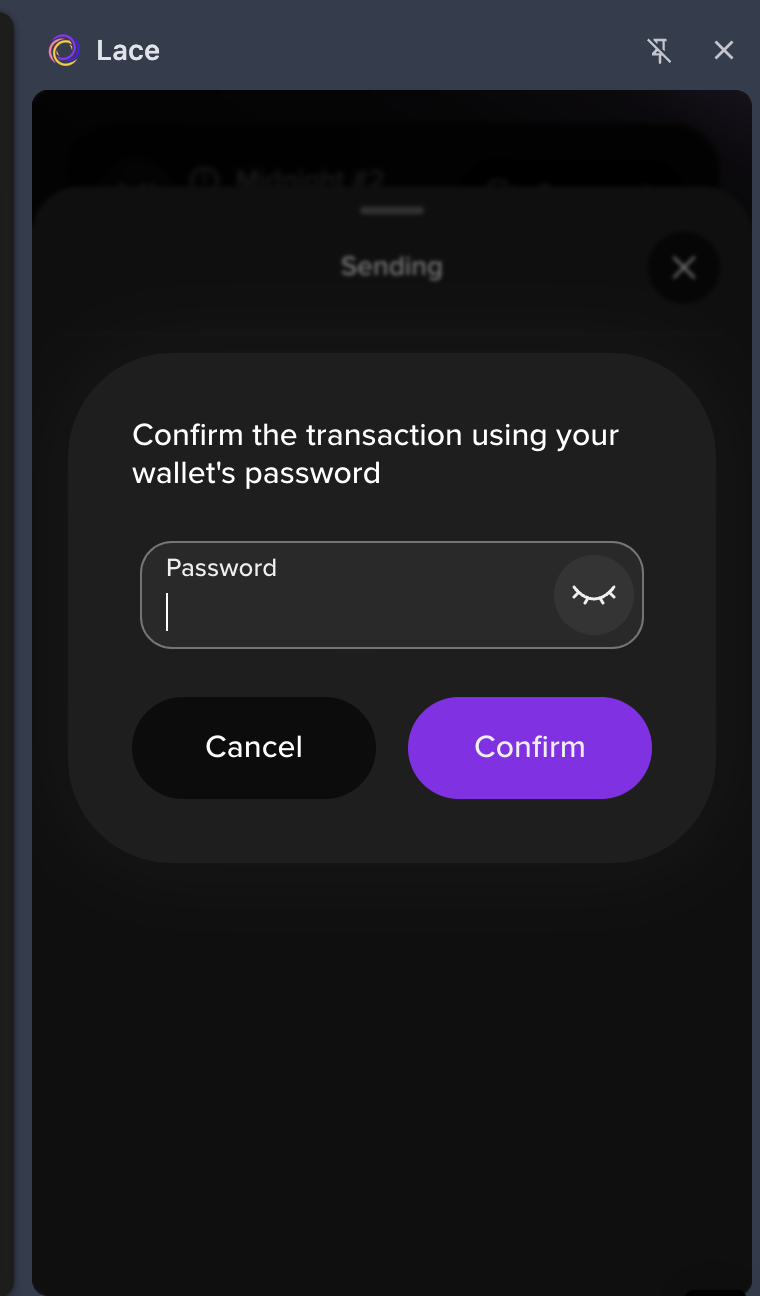 04 · passwordEnter your admin passwordConfirm the transaction with your Lace admin password, then Confirm.
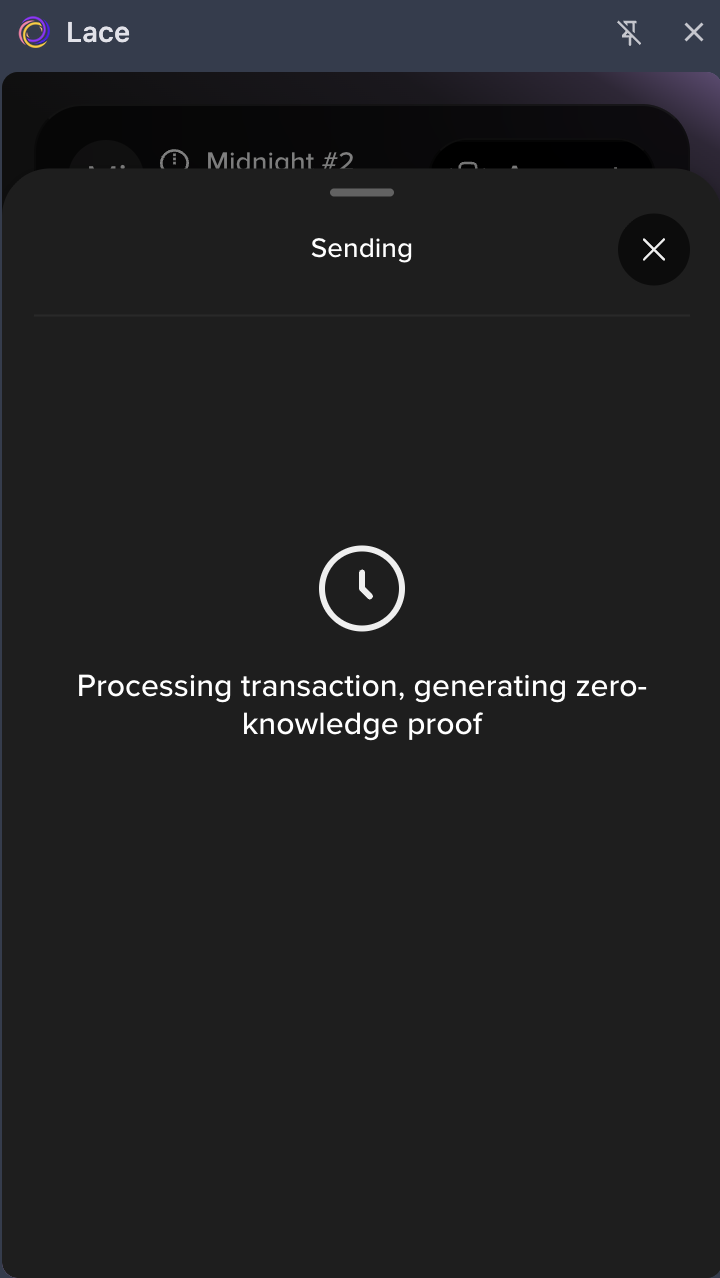 05 · processingGenerating the ZK proofProcessing transaction, generating zero-knowledge proof. Give it a minute — tDUST starts flowing once designation completes.
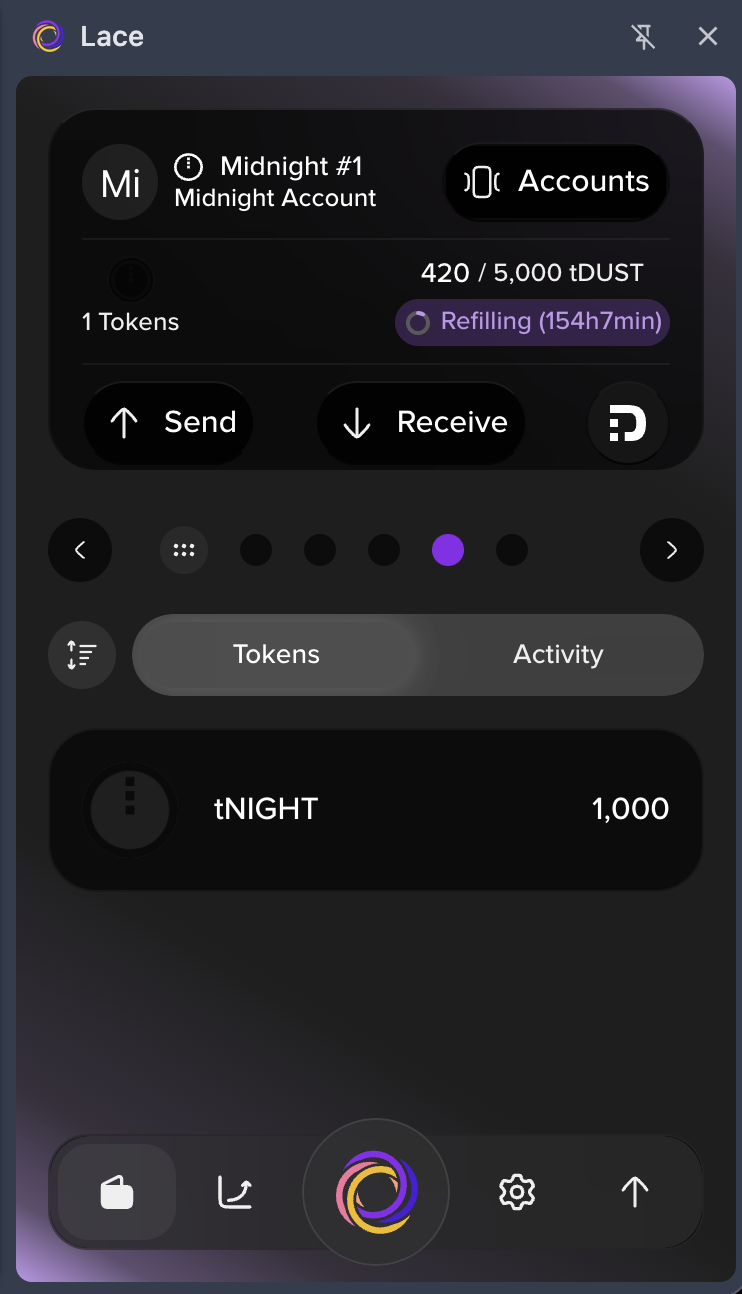 06 · refillingtDUST tank refillingBack on the wallet home the badge flips to Refilling (154h7min) and your tDUST balance climbs — e.g. 420 / 5,000 tDUST. You're ready to deploy.
Reuse your Lace seed in the deploy script.
scripts/deploy-midnight.mjs generates its own 24-word BIP-39 mnemonic on first run and stores it at .midnight-wallet.local. That wallet is not your Lace Mac Local wallet — so tDUST you generated in Lace is invisible to the script and the deploy exits with Not enough tDUST.
Open .midnight-wallet.local, copy the 24 words, and import them as a new wallet in Lace. Faucet tNIGHT to that wallet's unshielded address, generate tDUST, then re-run the script.
In Lace: Settings → Show Recovery Phrase for Mac Local (enter admin password). Copy the 24 words as one line, then on your machine:
echo "word1 word2 ... word24" > .midnight-wallet.local
chmod 600 .midnight-wallet.local
bun scripts/deploy-midnight.mjs
.midnight-wallet.local is already gitignored and created with 0600 permissions — don't commit it, don't share it, don't paste it into chat.WalletSeeds.fromMnemonic from @midnight-ntwrk/testkit-js), so Option B produces the exact addresses Lace shows. Verify before deploying:MIDNIGHT_WALLET_SEED="$(cat .midnight-wallet.local)" \ bun scripts/derive-unshielded-address.mjs --network=preprodThe printed shielded + unshielded addresses must match the ones in Lace. If they don't, you pasted the wrong seed.
Faucets & Addresses
Once Lace is installed, switch to the network you are building on and copy your address to request test tokens. Preprod is the default for hackathon demos; Preview is for bleeding-edge SDK features.
If a headless SDK wallet hangs for hours or OOMs on a fresh sync, Midnight DevRel (Jay Albert) recommends two remedies you can combine:
- Sync from where you left off — serialize wallet state after the first sync and restore it next run so only the delta syncs.
- Skip history you won't read — pass
NoOpTransactionHistoryStoragein the wallet config to cut memory during sync. Only safe when your script never queries transaction history.
Code snippets on the Known Issues page →